Creating Custom Packages for Unity 2018.3
Published on
tl:dr - Check out https://github.com/neogeek/unity-package-example to see what is required for publishing a custom Unity Package using git.
With the release of Unity 2018.3, the Unity Package Manager finally supports custom packages using git URLs!
There are just a few things needed to get a repo setup to be compatible with the package manager.
Setup
Create a new Unity project (unless you are starting with an existing one). Setup the project as a git repo and add the recommended .gitignore file from GitHub.
If you find yourself creating many Unity projects managed by git, you can add a function to your ~/.bash_profile like this one:
setupunity() {
    git init
    curl -o .gitignore https://raw.githubusercontent.com/github/gitignore/master/Unity.gitignore
    git add .
    git commit -m "Initial commit."
}
Create required files
Note: All of the following steps are required. There are additional things you can add like documentation, tests and other properties to the
package.jsonfile as recommended by the Package Validation Suite, which only works on local packages, not custom git installs.
package.json
Open up your favorite text editor and create a new file named package.json with the following contents in the Assets/ folder of your project. If you plan on storing the package files in a separate folder like Assets/Plugins/UnityPackageExample, place it in there. Change the values of the file to match your project.
{
  "name": "com.namespace.packagename",
  "displayName": "Package Name",
  "version": "1.0.0",
  "unity": "2018.3",
  "description": "Example package for use with the Unity 2018.3 package manager."
}
| Name | Description |
|---|---|
name |
This is the unique identifier for your project. Example: com.namespace.packagename |
displayName |
This is the name that will show up in the package manager. Example: Package Name |
version |
This is a semver number used to identify the version of the package. |
unity |
This is the minimum version of Unity needed to install the package. |
description |
The description that is displayed when the package is selected in the package manager. |
Assembly Definition File
Open Unity, navigate to the Project panel, right-click and select Create > Assembly Definition. Name the file whatever your projects name is. And then enter the same name into the inspector panel. This file tells Unity how to compile your files when included in another project.
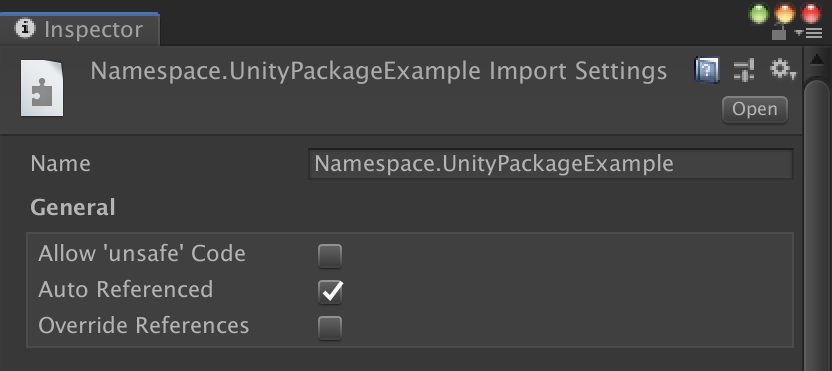
For more information about assembly definition files refer to the Unity documentation https://docs.unity3d.com/Manual/ScriptCompilationAssemblyDefinitionFiles.html.
Makefile
Back in your favorite text editor create a new file, this time at the root of your project, called Makefile. Add the following content. Change the Assets value to match the same directory the package.json file is in.
deploy:
    git subtree push --prefix Assets origin upm
Note: The Makefile will only work on MacOS, not Windows.
Pushing git repo
Now that you have set up each of the files necessary for a custom Unity package it's time to put it all together.
Commit all of the changes made to git and push to a remote git hosting service like GitHub, GitLab or Bitbucket.
Then open Terminal and run make deploy. This will create and push a new branch called upm that will contain only the contents of the folder containing your custom Unity package files. This branch will be used to install your package in other projects.
Never manually modify this branch!
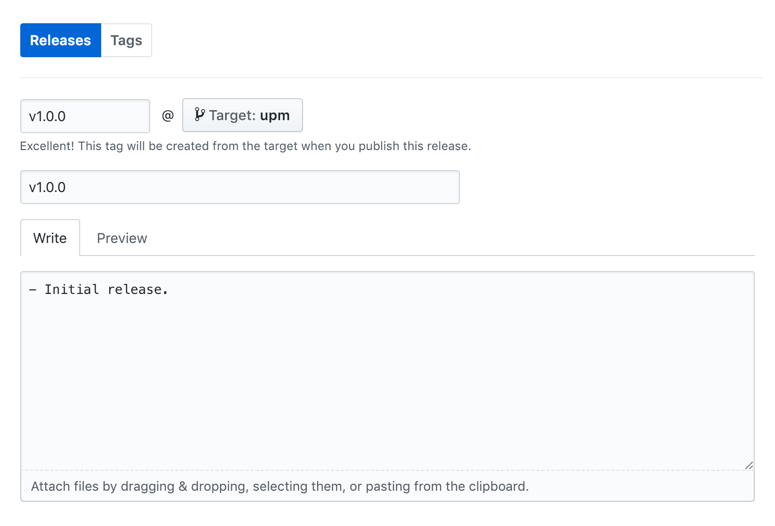
Making a release
If you want to have historical versions of your package you can make releases on whatever git hosting service you are using. Be sure to make the release from upm and not master. This will make it so you can reference the release tag and not the upm branch name.
Installing package in another project
Now that your code is online, it's time to include it in another Unity project! Open an existing or new Unity project. Open Finder and open Packages/manifest.json in your favorite text editor. Add the following line to the dependencies object. Change the values of the file to match your project.
{
  "dependencies": {
    "com.namespace.packagename": "https://github.com/user/repo.git#upm"
  }
}
com.namespace.packagename- Is thenameproperty in yourpackage.jsonfile.https://github.com/user/repo.git#upm- Is the HTTPS URL of your git repo. Note the#upmat the end. That is pointing to theupmbranch. If you are using historical version releases, change it to the version number of the release.
Returning to Unity will automatically install the package and update the manifest.json file with the latest commit hash of the upm branch to prevent updating the package every time you open your project.
Installing a private package in another project
With one additional step, you can install a private git repo as a Unity package.
Create a personal access token with the git hosting service you are using. Links for how to do that with the most popular services are listed below.
- GitHub - https://help.github.com/articles/creating-a-personal-access-token-for-the-command-line/
- GitLab - https://docs.gitlab.com/ee/user/profile/personal_access_tokens.html
- Bitbucket - https://confluence.atlassian.com/bitbucketserver/personal-access-tokens-939515499.html
When making the personal access token, make sure it has at least read access to private repos.
Copy and paste the token into the manifest.json file before the domain name of the HTTPS URL with an @ symbol separating them.
{
  "dependencies": {
    "com.namespace.packagename": "https://<personal-access-tokens>@github.com/user/repo.git#upm"
  }
}
Again, returning to Unity will automatically install the package.
Installing a package locally
If you'd like to make edits to your package locally and still test in another Unity project, all you have to do is change the URL in the Packages/manifest.json file to use a local file path URL as seen below. The path used must end with the directory that contains the package.json file.
{
  "dependencies": {
    "com.namespace.packagename": "file:/Users/scottdoxey/git/namespace.packagename/Assets"
  }
}
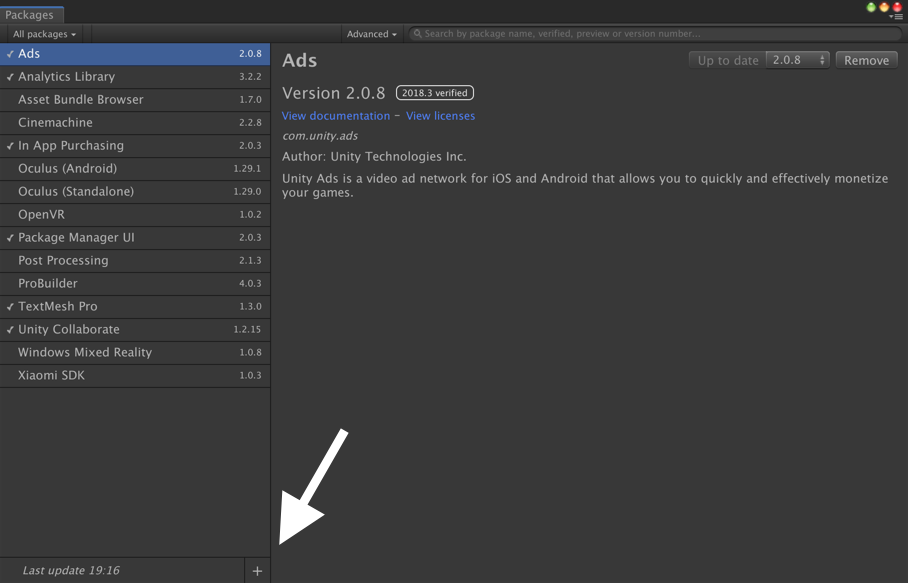
Or you can open the Package Manager from Window > Package Manager and click the Add package from disk... button as seen below.
Demo
Using only the instructions in this post, I've put together a simple demo and hosted it on GitHub.
https://github.com/neogeek/unity-package-example
--
That's it! Now you can share code between Unity projects with ease, either publicly or privately.
If you have any questions or comments please let me know via Twitter. Thanks!
📦 🎉
Links